How to Get the Perfect Glow with Self-Tanning Products
Okay, real talk: I used to believe that the only way to get a glow was to bake under the sun for hours. (I’ll wait for the gasp of horror). Fast forward a few skin-scorching sunburns later, I learned—Tanning products. Yep, those lifesavers are the key to that perfect, sun-kissed glow without turning your skin into a lobster. And no, you don’t have to bake in the sun or smell like sunscreen for hours. You can get that glow from the comfort of your couch.
Let’s get into the nitty-gritty of it: how do you choose tanning products that actually work? What’s the deal with mousse, sprays, and lotions? Buckle up—I’m about to spill everything I’ve learned from trial, error, and some questionable tan lines.
The Magic of Tanning Products
Here’s the thing: I’ve made my fair share of tanning disasters (ahem, 2017, I’m looking at you). But, thanks to tanning products, I don’t need to expose myself to the sun to get a flawless tan. And guess what? You don’t have to either.
Tanning products are like that best friend who always knows what to wear to make you look fabulous. They’ve got your back. These products offer:
- No UV damage: Finally, a way to get tan without the sun’s wrath. Goodbye, sunburn. Goodbye, premature wrinkles.
- Customizable tan: Want a light glow? Dark bronze? Or something in-between? Tanning products let you go from “just back from the beach” to “I live in California” real quick.
- Convenience: No need for an appointment at the salon. I’ve gotten the best results in my bathroom, drinking iced coffee and watching reruns of Friends.
- Long-lasting: It’s like a friendship that doesn’t end. You get a tan that sticks around for days, so you won’t need to keep reapplying it every day.
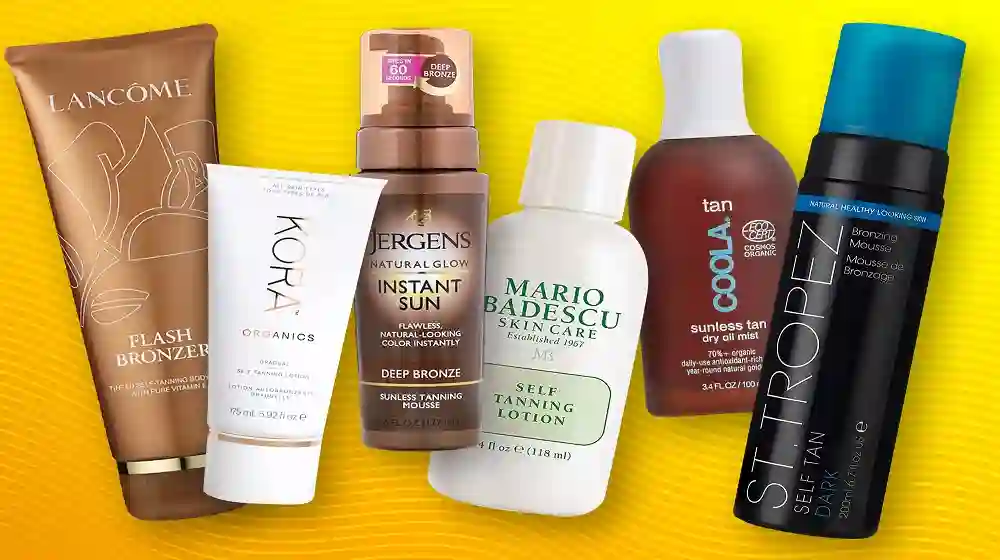
What Kind of Tanning Product Should You Choose?
It’s not a one-size-fits-all game, y’all. I’ve experimented with a few different tanning products, and while I’ve had my fair share of “oops, I look like a Cheeto” moments, I’ve also nailed down what works best for my skin. Here are the types I’ve tried, with my unfiltered thoughts on each:
Self-Tanning Mousse
Mousse is, hands down, the tanning product of my dreams. If you like the idea of quick results and zero mess, mousse is your go-to. It’s lightweight, dries fast, and gives you that deep, bronzed glow.
- How to Use: Pump the mousse onto a tanning mitt (or your hand if you’re feeling rebellious) and apply it in circular motions. Just don’t skip the mitt unless you want to look like you’ve been attacked by an orange marker.
- Best for: Fair to medium skin tones (like mine), or anyone who wants that deep “I just spent a week in Mexico” tan. I’ll admit, it does feel like you’re covering yourself in whipped cream.
Self-Tanning Lotion
Oh, lotion. The underdog of tanning products. This one is for the patient folks who want a gradual tan that doesn’t hit you like a freight train. My first attempt at using a tanning lotion ended in a streaky disaster, but I eventually got the hang of it.
- How to Use: Apply in long, smooth strokes, and be patient. I usually take my time, and I try not to rush—especially on elbows and knees. (Trust me, they’re like the landmines of the tanning world).
- Best for: If you’ve got dry skin or just want a subtle, not-too-dramatic tan. Also, if you’re in a “let’s not get all crazy about it” mood.
Self-Tanning Sprays
So here’s the deal: I really wanted to love self-tanning sprays. But, let’s be real, they just make me feel like I’m trying to airbrush my life together. But they do dry faster than mousse, which has its benefits. They also give you a more even application if you’ve got someone to help.
- How to Use: Hold the spray a few inches away from your skin, spray in short bursts. Just don’t do it in the bathroom unless you’re okay with your mirror looking like a Jackson Pollock piece.
- Best for: Those who want a light, quick fix or are spraying themselves down for an event. I once did this before a wedding and ended up looking like I’d been dipped in caramel.
Tanning Wipes
I’ll admit it—I have a love/hate relationship with tanning wipes. They’re super convenient, but I ended up accidentally wiping away half of the tan, leaving me with an uneven result. Facepalm.
- How to Use: Wipe the wipe across your skin in circular motions. Easy peasy. But don’t be too aggressive—less is more.
- Best for: People on-the-go or those who just need to tan their legs for a last-minute date (not speaking from experience or anything…).
Prep Your Skin: The Key to a Great Tan
Alright, y’all. Don’t skip the prep. I learned this the hard way, like, many, many times. Tanning products are only half the battle—the other half is preparing your skin like you’re about to paint a masterpiece.
Exfoliate
If you don’t exfoliate, your tan is gonna look like a patchy crime scene. Scrubbing off dead skin cells gives tanning products a clean canvas to work with.
- When to Exfoliate: Do it the day before you apply your tanning products. Trust me. Exfoliating right before you apply is asking for trouble.
- Pro Tip: Pay extra attention to elbows, knees, and ankles—these areas will suck up the tanning product like a sponge. I learned this after I walked around looking like a giraffe.
Moisturize
I learned this one the hard way after my first fake-tan experience (spoiler: I looked like a peeled tangerine). You want to moisturize before applying tanning products to avoid looking like the Sahara Desert.
- When to Moisturize: About 30 minutes before application. Let that lotion sink in. That way, your skin’s prepped, but not greasy.
- Pro Tip: Don’t go overboard—just a light application will do.
Shave or Wax
When I first started self-tanning, I forgot about this essential step. I ended up looking like a patchy, hairy, sunburned mess. It wasn’t cute. Wipe away the tears.
- When to Shave or Wax: Do it 24-48 hours before you apply tanning products. This gives your skin time to calm down before you go all in.
- Pro Tip: Don’t skip this! Your tan will look way more even if there’s no hair to block the product.
Apply Like a Pro (or at Least Try)
Alright, let’s be real: applying tanning products is an art. Or, you know, it should be. It’s all about technique, patience, and avoiding the urge to rush through it because you’re watching your favorite reality show.
Choose the Right Shade
Listen, picking the right shade of tanning product is critical. Don’t go too dark unless you’re trying to resemble an Oompa Loompa. Take it from me.
- Tip: If you’re new to self-tanning, start light. Build it up. Don’t dive into the deep end unless you’re ready for the consequences.
Apply Evenly
Use a tanning mitt. I know, it’s tempting to skip the mitt, but believe me—your hands will end up looking like a crime scene. Apply in circular motions, and keep the product moving so it doesn’t set unevenly.
Drying Time
This is key. You have to wait for the tanning product to dry. Don’t go jumping into clothes straight away. The last thing you want is a tan that transfers to your favorite shirt. I speak from experience.
Aftercare: Don’t Mess It Up
Listen, if you want your tan to last, you need to take care of it. Hydration is your best friend here, and not just because your skin will love you for it, but because it helps lock in that tan.
- Moisturize Daily: Don’t skip this step. Use a good lotion to keep your skin glowing and your tan intact.
- Exfoliate Later: Exfoliating too soon can lead to fading. I usually wait a few days before I even think about scrubbing away my tan.
Anyway, here’s the kicker: I once accidentally scrubbed too hard and ended up with a tan that looked like I had a bad sunburn. Oops.
Conclusion: You’re Ready for Your Tan
With all this info, you should be ready to dive into tanning products headfirst (but, you know, not literally). Get the glow you’ve always dreamed of, without the sunburn and hours spent baking outside. Trust me—tanning products are the game-changer you never knew you needed.